Saturday 27 October 2012

Create your own Wallpaper #1 : Rainbow

There are so many ways on creating nice HD wallpapers yourself in Photoshop, so I figured I would post a tutorial series on it. Today starting with a rainbow/spectrum wallpaper. I've seen alot of abstract wallpapers that look like this but here's how you create one yourself that is fully customizable to your own tastes.

So this is what a result could look like after following this tutorial :


  • First step as always create a new File in Photoshop with the resolution of your current screen resolution ( mine's 1920x1080 px )
  • Unlock your Background layer by double clicking on it 
  • Select the Gradient Tool (Hotkey : G) and create a black and white gradient form the bottom to the top. To do so click somewhere on the bottom of the image, hold shift and drag up until the upper edge of your background. 
  • You should be looking at something like this  : 


  • Next go to Filter > Distort > Wave
  • In the upcoming window change the number of generators to 10 and the Type to "Square" and press OK.


Result so far : 

Friday 26 October 2012

Tutorial : Glass Font #1

It's been a while since the last post but here is another tutorial.
As you might be able to guess from the title it is going to be about another text effect.

Before we start I'd like to show you how the result would look like :


I won't be going too much into detail as the steps are very similar to the ones in the Gold Text tutorial. 

  • Open up Photoshop and open a wallpaper that you like or one that you think would match with the glass text. If there is none, create a new image (File -> New...) and fill the background with a color of your choice using the Paint Bucket Tool ( Hotkey : G )
  • Once that's done, select the TextType Tool (T) and write a word with a big (200-300px) font (font-color : white). In this tutorial I'm gonna be using the font called "Franklin Gothic ITC Heavy"
  • Then we need to add a layer style by clicking the following button while having the text layer selected

  • From the drop-down choose "Blending Options..."
  • The next window should seem familiar if you have followed the gold text tutorial.
  • We need to add the following Styles : Bevel & Emboss, Stroke, Inner Shadow, Inner Glow, Satin, Drop Shadow
  • For keeping it short and easy i will be posting my settings that have worked out pretty well and that were used to get the result above. As always you can try and experiment with the settings to get something new. 

Monday 15 October 2012

Tutorial : How to create a Favicon in Photoshop

This is a little HowTo on how to pimp your own website a little bit by creating your own Favicon.
You may wonder what a Favicon is. The name itself stands for "Favorite Icon" and when you open a webpage in your browser the Favicon can be found here :

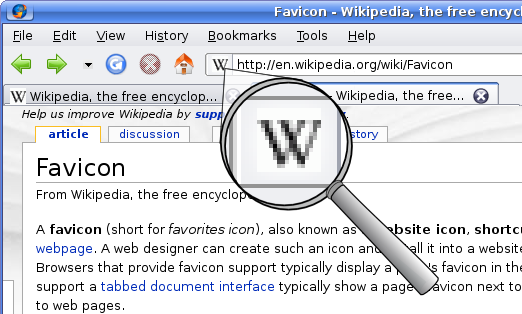
Image source : Wikipedia.org
Usually you will have a boring white page in that position instead of a custom icon. In order to change that we have to create one using Adobe Photoshop.

  • We need to download a plug-in for Photoshop called ICO Format in order to be able to save .ico files. The download for the plugin can be found at http://www.telegraphics.com.au/sw/. There might be other plugins but for this tutorial i recommend using this one. 
  • You will find a Readme.html along with the downloaded plugin but here is a short version of how to install it : 
    • Go to C:\Program Files\Adobe\Adobe Photoshop\Plug-ins\
    • Create a new folder called 'File Formats' if there's none yet
    • Put the downloaded "ICOFormat.8bi" into the File Formats folder and start up Photoshop
  • After that's done create a new picture in Photoshop with the dimensions 64x64 pixels.
  • Now you are free to draw or design whatever you like

  • When you're done hit File > Save As and select "Save as : Icon ( Windows ICON)(*.ico)"


Aaaand you are finished ! 

At this point I'd like to tell you how to set your favicon up but it depends on what webhost you are on. For Google Blogger you can directly upload a file and for all the others :
Upload the .ico to the root directory of your webspace and then insert the following line into the <head> section of all of your webpages : 

<link href="/favicon.ico" rel="SHORTCUT ICON"></link> 

Thursday 11 October 2012

Tutorial : Nice Gold Text Effect

Hey, finally back with another post !
I figured I would show how to create a nice Gold Text effect.

This is what you will be able to accomplish after this tutorial :

For example a nice wallpaper with your name on it

Difficulty : Easy (but needs a little time investment)


Thursday 4 October 2012

Tutorial : Black and White in Photoshop

This time I'm going to post a pretty easy one.
It's how to do Black/White Pictures in Photoshop. A friend recently requested me to edit a picture for him (TalesFromBombay). The task was, to isolate a certain part in the picture and let it be in color while the rest of the picture should be black and white. This effect is pretty useful to make certain things stand out (e.g. a single person standing in a crowded place)


With that being said, let's begin  :

Difficulty : Easy


Tuesday 2 October 2012

Tutorial : How to face swap in Photoshop

Here is the tutorial as promised :-)
Let's quit the unnecessary talking and get started :

For this tutorial we will be using the following picture :

(We want to copy the right face on the left girl)


Hilarious : Face Swapping / Facebombing


Ohh yeah... Again and again I find it very amusing when I find a similar picture on the internet.
For those who may not know yet : The procedure that happened in this picture, is also known as Faceswapping or Facebombing. You simply switch the face of one or more individuals with one that looks really funny (e.g. if someone's grimacing) and the best part of it is, that all of this can be easily achieved by using modern picture editing software like Adobe Photoshop.