
This is what the original wallpaper looks like :
And then I found a very similar one , probably created by someone else :

The reason why I wanted to show this 2nd example is, because it lacks some little tweaks in my opinion and in the following tutorial I can teach you how you can achieve the best result possible !
Let's get started :
1.) Create a document in Photoshop with the dimensions of your desktop resolution. For me I am going with an image size of 1920x1080.
2.) Create a new layer and grab the Gradient Tool (G) and create a White to Light Grey gradient across the whole canvas. Make sure you have a radial gradient selected. (You can use whatever colors you like ofc.)

3.) Time to choose your Pokemon Team. Preferably get images like the following examples with a white background. Reason for that is that they are easier to cut out then.

4.) Open your Pokemon Picture of choice in Photoshop and make sure to remove the white background with the Magic Wand Tool (W) by simply clicking on the background around the Pokemon and hitting ESC after a selection was created. If you open the picture in Photoshop and you see something like this :

It means that the background is transparent and you can simply hit CTRL+A to select all and CTRL+C to copy it. We now wanna paste it onto our background that we have created before. So switch back to the gradient background and paste the selection onto the canvas.
If your Pokemon seems to be to small hit CTRL+T to transform the selected layer, hold SHIFT and drag out one of the four corners to re-size your test subject.
5.) Once you are satisfied with the result grab the Magic Wand Tool (W) and still with the latest layer on top selected (Should be Layer 2) click somewhere on the background and it will create a selection all around the Pokemon. Important : Make sure you also cover up encased spots like the whole between wing and neck in this example :

You can add spots like that to the selection by holding SHIFT and clicking again on said spot.
If you have everything around the Pokemon selected press CTRL+SHIFT+I to inverse the selection or go to Selection > Inverse.
6.) Almost done. Duplicate Layer 1 which is our gradient background and drag it to the very top if it isn't added there automatically. In this process you need to have your selection still active. Now with the Layer 1 Copy selected hit DEL to crop the form of the Pokemon out.
7.) Get an element/abstract picture or something that would match your Pokemon and paste it between Layer 2 and "Layer 1 - copy"
8.) With "Layer 1 - copy" selected go to your layers window, press the "Add a layer style"-Button and select "Drop Shadow..." from the drop-down menu.

9.) You can play around and adjust/try out some new settings or just leave the default drop shadow effect values and you're pretty much done.
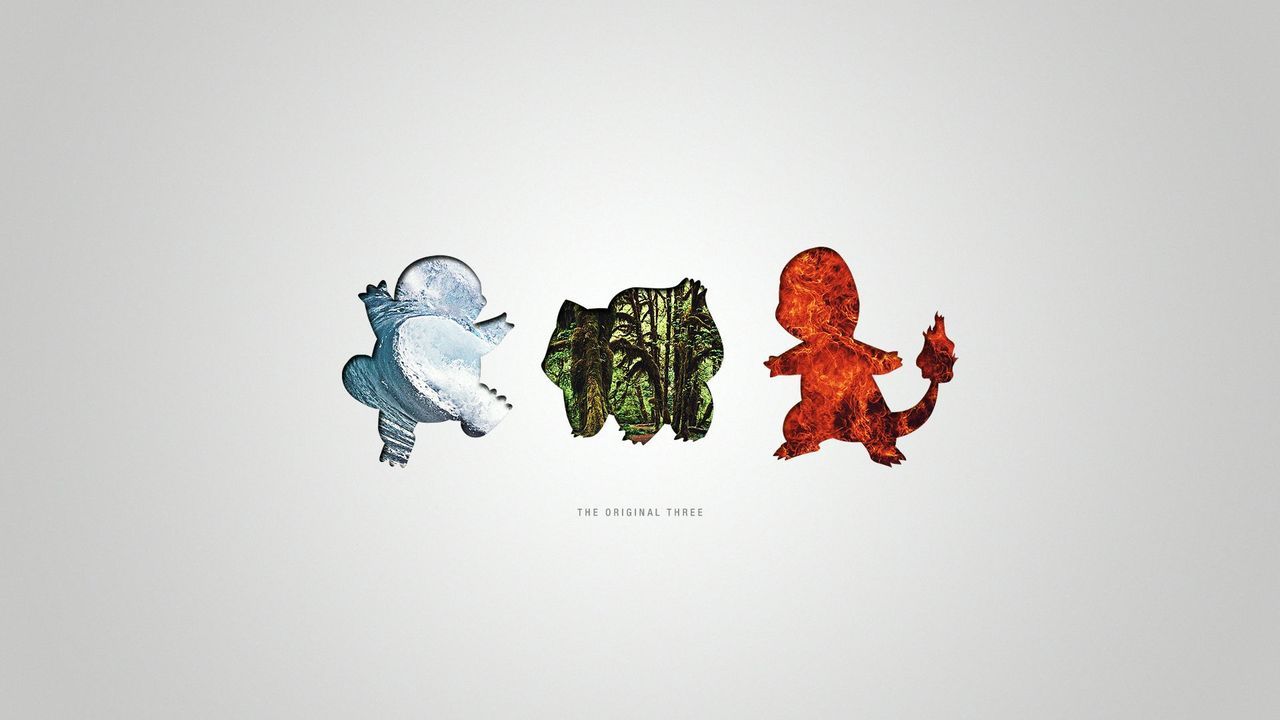
This is what a result could look like :

10.) Repeat and add as many Pokemon as you wish !

Hope you enjoyed this tutorial ! Have a nice day ;-)